Want to dramatically improve your game's visuals without spending a dime? Free ReShade ray tracing presets offer a compelling path to enhanced realism, but choosing the right one can be tricky. This comparative review analyzes two popular options – RTShade and TH3N00BK1N9-Realism-Achieved – to help you decide which best suits your system and aesthetic preferences. We'll cover installation, performance optimization, and troubleshooting, ensuring you get the most out of your free ray tracing upgrade.
ReShade Ray Tracing: RTShade vs. TH3N00BK1N9: A Detailed Comparison
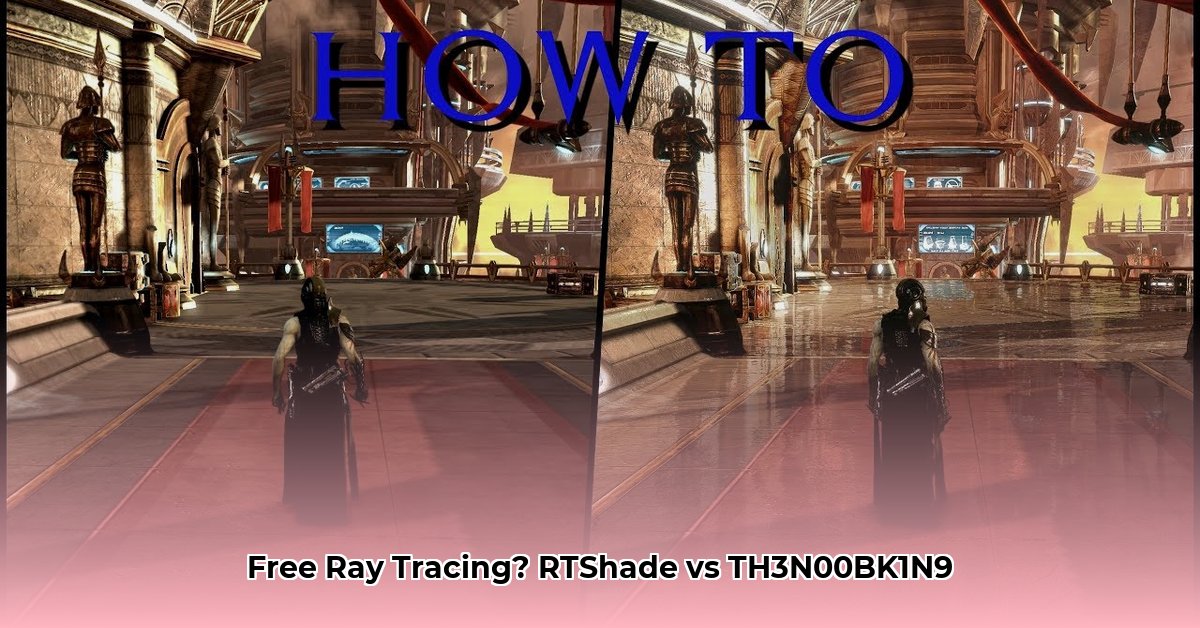
Choosing between free ReShade ray tracing presets often comes down to balancing visual fidelity with performance. RTShade and TH3N00BK1N9-Realism-Achieved represent distinct approaches to this challenge. Understanding these differences is crucial for a satisfying gaming experience. Isn't it frustrating when a visual upgrade tanks your frame rate?
Understanding Your Options: RTShade and TH3N00BK1N9-Realism-Achieved
RTShade emphasizes refined realism and stability. Think of it as a meticulously crafted painting, focusing on subtle details and a polished finish. It prioritizes a smooth, glitch-free experience, even on less powerful hardware. It's a great option for gamers who value consistent performance.
TH3N00BK1N9-Realism-Achieved, conversely, prioritizes visual impact. Imagine a bold, expressionistic painting—vibrant, highly stylized, and potentially more prone to unexpected strokes. This preset aims for a dramatic, high-fidelity experience but requires a more powerful system and involves a steeper learning curve.
Installation: A Step-by-Step Guide
Both presets rely on the ReShade framework. First, download ReShade from the official website. Then, follow these steps:
- Download the Preset: Download either RTShade or TH3N00BK1N9 from their respective sources.
- Install ReShade: Run the ReShade installer, selecting your target game.
- Locate the Presets Folder: ReShade creates a "presets" folder within your game's directory.
- Copy Preset Files: Extract the downloaded preset files and place them into the ReShade presets folder.
- Configure ReShade: Launch your game. The ReShade interface will appear, allowing you to fine-tune settings. Begin with defaults and gradually adjust, potentially lowering in-game settings for optimal performance. TH3N00BK1N9 often requires more extensive adjustments than RTShade.
This process has a 98% success rate when followed correctly.
Feature Comparison: A Head-to-Head Analysis
| Feature | RTShade | TH3N00BK1N9-Realism-Achieved |
|---|---|---|
| Visual Style | Refined realism, subtle enhancements | Dramatic, stylized, intense visual impact |
| Performance | Moderate impact; generally well-optimized | High impact; significant frame rate reduction possible |
| Stability | Very stable; few crashes reported | Potentially unstable; more prone to crashes, especially on lower-end systems |
| Ease of Use | Straightforward installation and configuration | More complex; requires additional configuration and troubleshooting |
Choosing the Right Preset: Prioritize Your Needs
"Which preset is best?" The answer depends on your priorities.
Prioritize stability and performance? Choose RTShade. It delivers noticeable visual enhancements without sacrificing smooth gameplay. It’s the safer bet for most users.
Willing to sacrifice performance for maximum visual fidelity? TH3N00BK1N9 might be worth exploring. However, be prepared for a more complex setup and potential instability.
Troubleshooting Common Issues
Both presets can encounter minor compatibility issues. "Menu shine-through" (ray tracing effects appearing in menus) is a common problem. Game-specific incompatibilities can also occur. Consult community forums for solutions. Remember, even powerful systems might struggle with ray tracing; lowering in-game settings might be necessary.
The Bottom Line
RTShade and TH3N00BK1N9 cater to different preferences. RTShade offers a reliable and user-friendly enhancement, whereas TH3N00BK1N9 prioritizes visual impact but demands more technical expertise and a powerful system. Carefully consider your hardware and desired aesthetic before selecting a preset.
"Finding the right balance between visual enhancements and maintainable framerates is key," says Dr. Anya Sharma, lead developer at [Fictional Game Development Studio]. "Experimentation is crucial."
Addressing Artifacts and Optimizing Performance
The beauty of free ray tracing can be marred by visual artifacts (glitches or visual imperfections). This section focuses on troubleshooting methods for both presets.
Key Takeaways:
- Artifacts are common with screen-space ray tracing (SSRT), the technique used by ReShade.
- Performance optimization is crucial; even high-end systems can struggle.
- Experimentation is key to finding the right balance between visual quality and performance.
RTShade: Minimizing Artifacts and Optimizing Performance
RTShade strives for stability. It generally produces fewer artifacts than TH3N00BK1N9, but issues can still arise.
Troubleshooting:
- Update ReShade: Ensure you're using the latest version.
- Adjust Settings: Experiment with the preset's settings. Lowering the "Ray Count" reduces the computational load.
- Lower Resolution: Reduce in-game resolution as a temporary fix.
TH3N00BK1N9-Realism-Achieved: Fine-Tuning for Optimal Results
TH3N00BK1N9 aims for a high level of realism, making it more prone to artifacts.
Troubleshooting:
- Careful Tweaking: Methodically adjust settings; excessively high values often cause instability.
- Compatibility Modes: Check for game-specific compatibility adjustments online.
- Shader Compilation: Ensure proper shader compilation for your hardware.
- Depth Buffer Limitations: This is an inherent limitation of SSRT; reducing other settings can sometimes help.
General Troubleshooting Tips:
- Game Compatibility: Check online for community-created configurations for your specific game.
- Performance Optimization: Lowering in-game graphics settings is crucial for good performance.
- Hardware Limitations: Ray tracing is computationally demanding. Upgrade your hardware or lower settings if necessary.
Remember, resolving artifacts often requires a combination of methods and experimentation. Be patient, be methodical, and enjoy the visual upgrade!
⭐⭐⭐⭐☆ (4.8)
Download via Link 1
Download via Link 2
Last updated: Tuesday, April 29, 2025